1. What is VSMS Connect? #
VSMS Connect (Vanuatu SMS Connect) is a mobile and web application built by Code200 Solutions to help businesses in Vanuatu comply with the country’s mandatory TaxCore fiscalisation requirements.In Vanuatu, every eligible business invoice must be digitally signed by a government-certified Signing Device Controller (SDC/V-SDC) and submitted to the TaxCore platform operated by the Vanuatu Revenue Service. VSMS Connect automates this entire process — connecting your existing accounting system directly to TaxCore so that invoices are signed and submitted without any manual steps.
Who is it for? #
Business owners and accountants in Vanuatu using Xero, Sage, or MYOB
Businesses operating on-premise point-of-sale systems (Amicus, Sage 100, Sage 200 Evolution, Sage 300)
Administrators who need to manage teams, locations, and compliance records
What does it do? #
| Feature | What it means for you |
|---|---|
| Accounting integration | Connects to Xero, Sage, or MYOB and pulls your invoices automatically |
| Automatic fiscalisation | Signs every eligible invoice through your V-SDC and submits it to TaxCore |
| Audit readiness | Stores signed audit packages on secure servers until TaxCore confirms receipt |
| Team management | Invite staff, assign roles, control who can do what |
| Multi-location support | Manage separate locations and signing certificates under one account |
| Receipt printing | Optionally dispatch fiscal receipts to connected receipt printers |
VSMS Connect is a middleware fiscalisation platform that integrates with accounting and ERP systems such as Sage, Xero, and Amicus Solutions, securely transmitting invoice and sales transaction data to VSMS for fiscalisation. The platform also supports GS1 Global Trade Item Numbers (GTIN), including GTIN-8, GTIN-12 (UPC), GTIN-13 (EAN), and GTIN-14. Product records containing GTINs are preserved during synchronization, ensuring consistent product identification across all integrated platforms.
VSMS Connect does not connect to or control any peripheral hardware such as barcode readers, scales, or cash drawers. Receipt printing is handled by the optional Print Agent—a lightweight background service that runs silently on the printer’s host computer and communicates only with the receipt printer and the VSMS Connect backend over the network. It does not access USB ports, COM ports, or any input devices, and does not interfere with any other software or hardware running on the same machine. Standard POS operations are completely unaffected. The Print Agent is not required for cloud connector configurations (e.g. Xero).
Operator Interface and Input #
VSMS Connect provides a full graphical user interface accessible via web browser and mobile app (iOS and Android). Operators interact with the system using standard touch and keyboard input. The interface accepts the following types of operator commands and data entry:
- Authentication: Operators enter their email and password to log in. Password reset codes are entered via on-screen input fields.
- Business configuration: Administrators enter TIN, address, PAC codes, V-SDC UID, and upload PFX certificates directly through the app’s configuration screens.
- Invoice management: Operators tap to select, search, filter, fiscalise, cancel, copy, and refund invoices.
- Team management: Administrators enter email addresses and assign roles when inviting team members.
All data entry is performed through the application’s own screens — no separate terminal, hardware keypad, or external input device is required.
2. Getting Started #
Signing In as a Returning User #
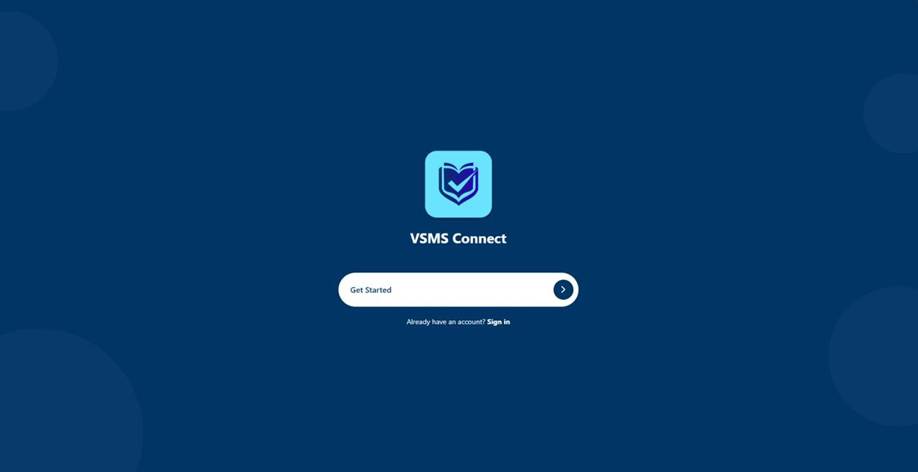
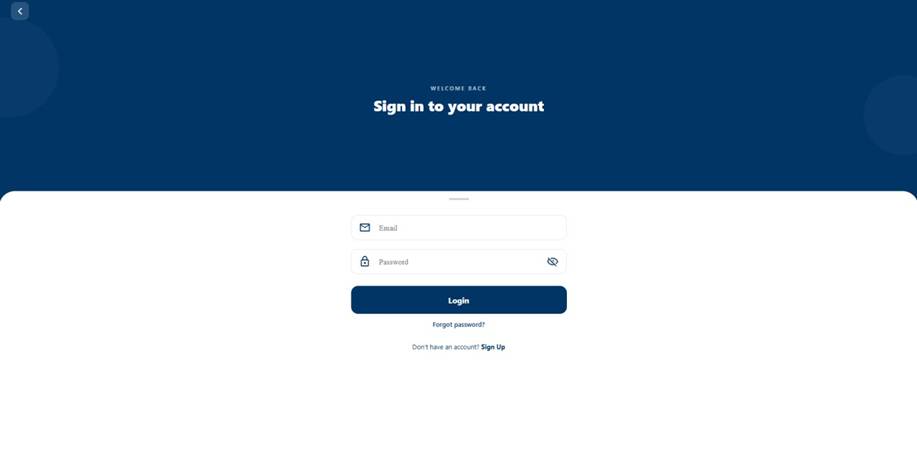
Press the Sign in link on the welcome screen if you already have an account. Enter your Email and Password then press Login.
- If correct, the app routes you straight to the dashboard.
- If wrong, a red “Invalid credentials” banner appears. Wait a moment and try again.
- If you have forgotten your password, press Forgot password. VSMS Connect sends a six-digit reset code to your registered email address. Enter the code when prompted and choose a new password.
Step 1 — Create Your Account #
The first person to register on a fresh VSMS Connect installation becomes the owner. Subsequent team members are added via invitation only — you cannot self-register after the first account exists.
1. Open the VSMS Connect app or visit the web version.
2. On the login screen, tap Create Account.
3. Enter your full name, email address and a strong password.
4. Tap Register.
5. You will be logged in immediately.
Note: If your organisation already has an account and you have received an invitation link, tap that link instead and follow the Accept Invitation flow rather than registering from scratch.
Step 2 — Register Your Business #
After creating your account you must register the business before any other features become available.
1. From the home screen, tap Register Business (or navigate to Businesses in the sidebar).
2. Fill in:
Business Name — your legal trading name
Tax Identification Number (TIN) — issued by the Vanuatu Revenue Service
Address — street, city, country
3. Tap Save.
Your business is now created. You can register multiple businesses under one account if needed.
The country field requires an ISO 3166-1 alpha-2 code (for example, VU for Vanuatu). The reporting currency defaults to VUV (Vanuatu Vatu).
Step 3 — Connect Your TaxCore Credentials #
Your business must be linked to a V-SDC signing certificate before any invoice can be fiscalised.
1. Go to Business Registration → TaxCore Configuration (or open your business and tap Configure TaxCore).
2. Upload your PFX certificate file issued by the Vanuatu Customs and Revenue Service.
3. Enter the certificate password.
4. Enter your PAC (Provider Authentication Code) — also issued by the Revenue Service.
5. Enter your UID (unique device identifier for your V-SDC).
6. Tap Save & Verify. VSMS Connect will test the connection to TaxCore immediately. If the credentials are incorrect you will see an error — double-check your PAC and UID.
Where do I get these? Your TaxCore credentials (PFX certificate, PAC, UID) are issued by the Vanuatu Revenue Service when your EFD (Electronic Fiscal Device) is registered. Contact them or your tax agent if you do not have them.
After saving, the Businesses screen shows a certificate status badge — green Uploaded if the certificate is active, or red Not uploaded if credentials are missing.
Step 4 — Connect Your Accounting System #
VSMS Connect supports three cloud accounting providers and several on-premise systems.
Cloud providers (Xero, Sage, MYOB) #
1. Go to Integrations in the sidebar.
2. Tap your provider — Xero, Sage, or MYOB.
3. Tap Connect.
4. A browser window opens to your provider’s login page. Sign in with your accounting credentials and authorize VSMS Connect.
5. You are redirected back to the app. The integration status shows Connected.
Once connected, VSMS Connect begins pulling your invoices via three automatic paths:
Webhooks (Xero only) — near real-time; invoice appears within seconds of being marked as paid in Xero.
Scheduled sync — every 15 minutes, the consumer service checks for new invoices from all providers.
Manual Sync Now — tap the Sync Now button on your provider screen to force an immediate pull.
You can connect Xero, Sage, and MYOB all at the same time under the same business.
Note: Sage accounts are scoped to a single business per OAuth token — there is no tenant selector after connecting Sage. For Xero, if your account has multiple organisations, you will be asked to select the active tenant after connecting.
On-premise systems (Amicus, Sage 100/200 Evolution/300) #
On-premise systems use the Sales Agent — a lightweight background service installed on your Windows, Linux, or macOS server that reads directly from your local POS database and pushes invoices to VSMS Connect. See Section 9 — On-Premise Sales Agent for full setup instructions.
Step 5 — Invite Your Team #
1. Go to Users in the sidebar.
2. Tap Invite User.
3. Enter their email address and select a role (see role descriptions below).
4. Tap Send Invite. They will receive an email with a one-time link to set up their account.
Roles explained #
| Roles | What They Can Do? |
|---|---|
| Administrator | Full access — manage business settings, connections, users, certificates, and locations |
| manage_users | Invite and edit users |
| view_invoices | Read-only access to the home dashboard and invoice detail screens |
| submit_invoices | Includes view_invoices, plus CSV import and manual fiscalisation |
| update_business_settings | Edit business name, address, and currency |
| update_taxcore_credentials | Edit the V-SDC certificate, passphrase, PAC, and UID |
| view_audit | Open the Audit screen and read the activity log |
An Administrator can change another user’s role at any time from the Users screen.
Invitation links are valid for 72 hours. If the invitee does not register within that window, go to the Users screen and send a new invite.
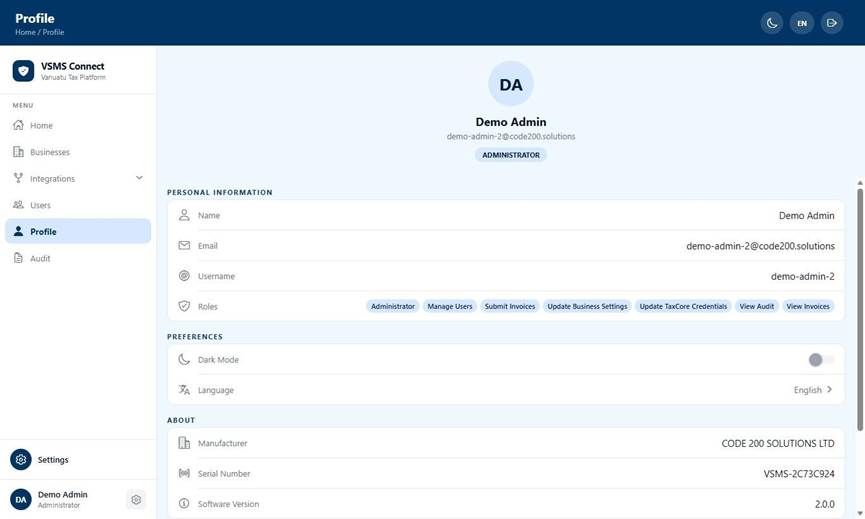
The About Card #
The Profile screen includes an About card showing your device’s registration details. This is useful when contacting support.
- Manufacturer: CODE 200 SOLUTIONS LTD
- Serial Number: VSMS-537B8BFD
- Software Version: 1.0.0
3. The Dashboard — Understanding the Home Screen #
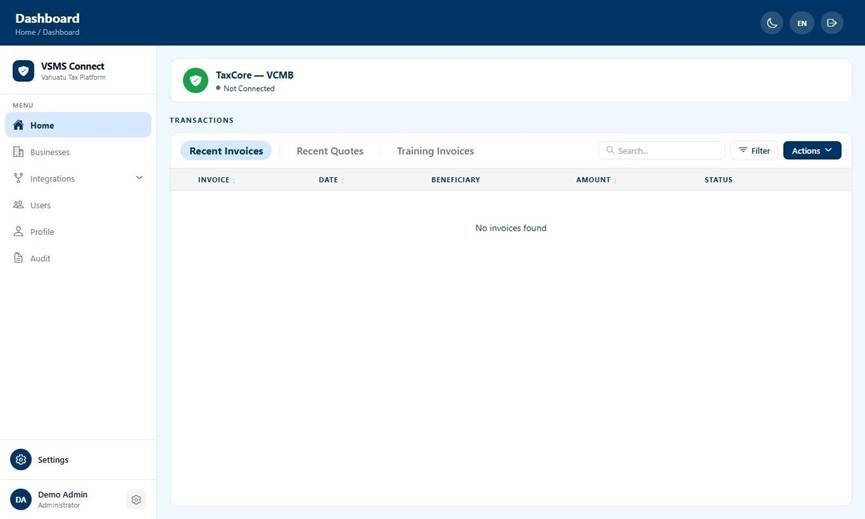
After setup, the Home screen is your main workspace. It displays all invoices pulled from your connected accounting system(s).
Sidebar Navigation #
The left-hand sidebar (web) or slide-out drawer (mobile) shows only what your role permits.
- Home — Invoice table, search, filters, and batch actions. Requires: view_invoices or administrator.
- Businesses — Details, locations, certificates, API keys, receipt printers. Requires: administrator or manage_users.
- Integrations — Accounting provider connections and tax-rate mappings. Requires: administrator.
- Users — User list and invite panel. Requires: manage_users or administrator.
- Profile — Account settings. Available to all authenticated users.
- Audit — Full activity log, event detail, and CSV export. Requires: view_audit (administrators bypass automatically).
The Three Tabs #
The home screen is divided into three tabs that filter the same invoice data:
| Tab | What it shows |
|---|---|
| Invoices | All standard invoices (excluding Proforma and Training type) |
| Quotes | Proforma invoices only |
| Training | Training-mode invoices only (used for V-SDC testing) |
Switching tabs resets your search, pagination, and any selection — this is by design.
Searching and Filtering #
Use the search bar at the top to search by invoice number, contact name, or amount.
Use the filter icon to narrow results by status, date range, or accounting source.
Date filters offer four quick options: Today, This Week, This Month, and Custom range. A provider chip lets you narrow results to invoices from a specific accounting source (Xero, Sage, MYOB, or CSV).
Invoice Status Labels #
Every invoice displays a colour-coded status:
| Status | Meaning | What to do |
|---|---|---|
| Imported | Invoice pulled from your accounting system, waiting to be fiscalised | No action needed if auto-fiscalise is on. Otherwise select the invoice and press Fiscalise. |
| Processing | Currently being sent to TaxCore for signing | Wait — this clears automatically once TaxCore responds. |
| Fiscalised | Successfully signed and submitted to TaxCore | Print or share the receipt. Use Copy or Refund from the payment row if needed. |
| Failed | Signing failed — see the invoice detail for the reason | Open the invoice, read the error reason, fix the underlying issue, then re-fiscalise. |
| Cancelled | Invoice has been fiscalised as a cancellation | No action — the cancellation is final. |
| Unmapped | Invoice contains a tax type that has not been mapped to a TaxCore tax rate yet | Ask your administrator to map the tax code under Integrations → Tax Rate Mappings. |
| Blocked | A precondition is not met — missing tax mapping, missing referent document, or currency mismatch. The invoice cannot be fiscalised until the issue is resolved. | Resolve the reason shown under the status pill. Most blocks require an administrator to map a tax code or link a referent invoice. |
4. Fiscalisation — How It Works #
Fiscalisation is the act of digitally signing an invoice using your V-SDC and submitting it to TaxCore. In Vanuatu this is legally required for every eligible invoice your business issues.
Automatic Fiscalisation (Recommended) #
By default, Auto-Fiscalise is ON. Every time a new eligible invoice is imported from your accounting system, VSMS Connect automatically:
1. Validates the invoice against your TaxCore configuration.
2. Creates a signing job and sends it to the processing queue.
3. Calls your V-SDC to sign the invoice.
4. Receives the fiscal response (invoice number, QR code, verification URL, timestamp).
5. Marks the invoice as Fiscalised.
You do not need to do anything — it happens in the background.To toggle auto-fiscalise:
1. Go to Integrations → select your provider.
2. Find the Auto-Fiscalise switch.
3. Toggle it ON or OFF.
Tip: Keep Auto-Fiscalise ON unless you have a specific reason to review invoices before submission (e.g. tax mapping issues).
You can fiscalise up to 10 invoices per job. For bulk operations, VSMS Connect automatically groups them into batches of 10.
Manual Fiscalisation #
You can fiscalise invoices manually — individually from the detail screen, or in batches of up to 10 from the home table.
Batch fiscalisation:
- On the Home screen, tick the checkbox on each invoice row you want to fiscalise.
- The action bar at the top of the table shows a running count of selected rows.
- Press Actions → Fiscalise.
- Rows refresh automatically and flip to Fiscalised once the V-SDC signs them.
The Fiscalise button is disabled if more than 10 rows are selected. This limit is enforced server-side as well.
Single-invoice fiscalisation:
- Open the invoice from the home table.
- In the Payments section, press Fiscalise on the payment row.
What happens after fiscalisation? #
Once an invoice is fiscalised, VSMS Connect stores:
Fiscal Invoice Number — the TaxCore-assigned number
QR Code — printable on receipts
Verification URL — customers can verify authenticity
Fiscal Timestamp — date and time of signing
Raw V-SDC Response — stored server-side for audit
These are visible on the invoice detail screen and can be printed or shared.
5. Managing Invoices #
Viewing an Invoice #
Tap any invoice on the Home screen to open its detail view. You will see:
- Invoice number, date, contact name
- Line items with descriptions, quantities, unit prices, and tax rates
- Payment information (amount, payment method, tender breakdown)
- Fiscal information (once fiscalised): fiscal number, QR code, verification URL
- Status history
Cancelling an Invoice #
If an already-fiscalised invoice needs to be voided:
1. Open the invoice.
2. Tap Cancel Invoice.
3. Confirm the action.
VSMS Connect sends a cancellation fiscal request to TaxCore. The invoice is re-signed as a reversal, referencing the original fiscal number. You can also bulk-cancel up to 10 invoices at once from the Home screen using the selection checkboxes.
Copying an Invoice #
A Copy creates a duplicate of a fiscalised invoice (used when a customer needs a replacement receipt):
1. Open the fiscalised invoice.
2. Tap Copy Invoice.
3. A new invoice is created with type COPY, referencing the original.
VSMS Connect automatically populates the
referentDocumentNumberfield in the V-SDC fiscal request with the original invoice’s fiscal number, ensuring the Copy is traceable to its source document.
Refunding an Invoice #
A Refund creates a reversal invoice:
1. Open the original fiscalised invoice.
2. Tap Refund Invoice.
3. A new invoice is created with transaction type REFUND, referencing the original payment.
VSMS Connect automatically populates the referentDocumentNumber field in the V-SDC fiscal request with the original invoice’s fiscal number. This reference is validated before submission — a Refund cannot be fiscalised without a valid original invoice reference.
Only one refund is permitted per payment on standard invoices. AMICUS on-premise invoices support multiple refunds per sale.
Only one refund is permitted per payment. If you need to reverse a payment a second time, escalate to your administrator — they can use the cancellation flow instead.
Using the kebab menu #
Alternatively, expand the payment row by pressing the chevron, then press the ⋮ kebab menu on the right side. It offers Copy and Refund directly without navigating to the action buttons. The new invoice is fiscalised immediately and appears under Linked Invoices on the original.
Understanding Payment Types #
| Payment Type | Description |
|---|---|
| Cash | Physical cash payment |
| Card | Credit or debit card payment |
| Check | Payment by cheque |
| Wire Transfer | Bank transfer or direct deposit |
| Voucher | Pre-purchased voucher redemption |
| Mobile Money | Mobile money payment (e.g. M-Vatu) |
| Other | Any other accepted payment method |
VSMS Connect supports split-tender payments — a single invoice can be paid across multiple payment types (for example, part Cash and part Card). The full tender breakdown is passed to V-SDC as the payment[] list in the fiscal request, in compliance with the V-SDC API specification. Split-tender is supported across all connected accounting platforms (Amicus, Sage 200 Evolution, and the direct HTTP API) and the breakdown is visible in the app’s invoice detail view.
Compliance with Technical Instructions for EFD Suppliers #
VSMS Connect supports all payment types required by the V-SDC Technical Instructions for EFD Suppliers. Each invoice submitted to TaxCore includes a
payment[]array identifying the payment method(s) used. The supported payment types — Cash, Card, Check, Wire Transfer, Voucher, Mobile Money, and Other — map directly to the payment codes accepted by the V-SDC fiscalisation engine. Split-tender invoices pass multiple entries in thepayment[]array, one per payment method used, fully satisfying the multi-payment requirement.
NOTE: The following restrictions apply to VSMS Connect as a middleware fiscalisation platform, in compliance with the Technical Instructions for EFD Suppliers:
- VSMS Connect cannot issue an invoice unless it is connected to a V-SDC. Every invoice requires a live signing round-trip with the V-SDC; if that connection is unavailable, no fiscal invoice is generated.
- VSMS Connect cannot omit or edit any information contained in the invoice response received from the V-SDC. The fiscal invoice number, QR code, verification URL, and timestamp are stored and displayed exactly as returned by the V-SDC, with no modification.
- VSMS Connect cannot register a sales amount without issuing a fiscal invoice. Every sales transaction is only issued once it has been submitted to, and signed by, the V-SDC.
- The header of every fiscal invoice (identification of the issuing business) reproduces the data returned by the V-SDC in full — the TIN, business name, and address are never omitted, truncated, or altered from the SDC’s response.
Handling Blocked Invoices and Errors #
A blocked invoice shows the block reason directly under the status pill. The most common reasons and their recovery paths are:
| Reason | Recovery |
|---|---|
| Missing tax mapping | An administrator must map the provider tax code to a V-SDC label on the Integrations screen. After the mapping is confirmed, blocked invoices unlock automatically. |
| Referent document missing | The credit note has no linked original invoice. Link it in your accounting system and re-sync. |
| Referent not fiscalised | The original invoice this refund references has not been fiscalised yet. Fiscalise the original first — the refund will become eligible automatically. |
| Currency mismatch | The invoice was issued in a currency other than the business currency. Re-issue in the business currency. |
| Total mismatch | The sum of line items does not match the invoice total. Correct the invoice at the source and re-sync. |
Failed invoices include the V-SDC error message in the same place. Common causes are connectivity issues to V-SDC and certificate problems — retry once after a minute. If the failure persists, escalate to your administrator.
Advance and Proforma Invoice References #
When issuing a Normal Sale invoice that completes or follows an Advance (deposit/layby) or Proforma invoice, VSMS Connect supports attaching a Reference Number to the Normal Sale invoice. This reference links the final sale back to the originating Advance or Proforma document, satisfying the V-SDC requirement for traceable multi-stage transactions. The reference number is carried through to TaxCore in the fiscalisation payload.
6. The Audit Log #
Electronic Journal / Invoice List #
VSMS Connect serves as a middleware fiscalisation platform and does not function as a standalone POS cash register. In place of a traditional electronic journal, the platform provides two complementary views:
- Invoice List — The Invoices screen (Section 3) displays a complete list of all issued invoices with the ability to search by invoice number, contact name, or amount, and filter by status, date range, and accounting provider.
- Audit Log — The Audit screen (Section 6) provides a tamper-evident log of every action performed in the system, including all invoice operations, with timestamps, user identity, and IP address — exportable to CSV for offline review.
No login to an external portal is required to access either of these views — both are built into the VSMS Connect application directly.
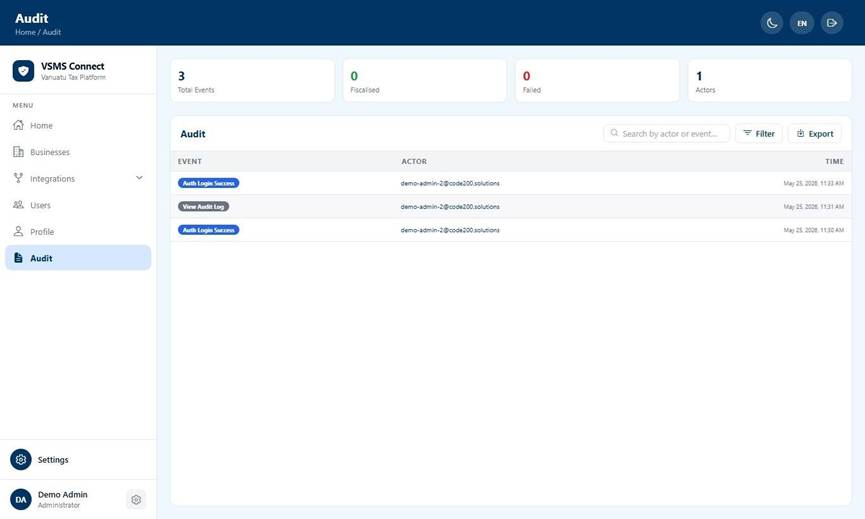
The Audit screen is a complete, tamper-evident log of every significant action taken within your account.
What is recorded? #
Every event is logged with a timestamp, the actor’s email, and relevant details:
- User login / logout / password changes
- Invoice fiscalisation, cancellation, copy, refund
- Fiscalisation job creation and completion
- Accounting provider connections and disconnections
- Business settings changes
- User invitations and role changes
- TaxCore credential updates
- Auto-fiscalise toggle changes
Each event also records the actor’s IP address and user agent, providing a full forensic trail for compliance inspections.
Filtering the Audit Log #
Use the filter panel to narrow results by:
- Event type (e.g. show only fiscalisation events)
- Date range
- Actor (who performed the action)
Why does this matter? #
The audit log is your primary evidence record for the Vanuatu Revenue Service. Keep it clean — every action is traceable to a specific user and timestamp.
7. Tax Rate Mappings #
Before VSMS Connect can fiscalise an invoice, every tax rate used in that invoice must be mapped to a TaxCore tax type. Receiving Tax Rates from TaxCore
Receiving Tax Rates from TaxCore #
When a signing certificate is registered in VSMS Connect, the platform automatically retrieves the current tax rates from the V-SDC (TaxCore) service only. These rates — including VAT, STT, PBL, and any other active tax types — are pulled directly from TaxCore as part of the configuration process and stored locally for invoice processing. Administrators do not enter tax rates manually; they are received from the SDC and kept in sync automatically. The tax mapping step below connects those TaxCore-provided rates to the corresponding tax codes used in your accounting system.
Why is this needed? #
Your accounting system (Xero, Sage, MYOB) may use custom tax rate names (e.g. “VAT 15%”, “Exempt”, “Zero-rated”). TaxCore uses its own fixed set of tax type codes. VSMS Connect needs to know which of your accounting tax rates corresponds to which TaxCore code.
How to map tax rates #
1. Go to Integrations → select your provider.
2. Scroll to Tax Rate Mappings.
3. Any unmapped tax rates from your imported invoices will appear here with a warning banner.
4. For each unmapped rate, select the correct TaxCore tax type from the dropdown.
5. Tap Save Mappings.
The valid V-SDC labels are F (standard taxable supply), N (non-taxable / zero-rated), P (proforma), E (exempt), T (tourism levy), A, B, C, D (rates A through D). Assign the label that matches the nature of the supply for each tax code.
Some rows are flagged Needs review in amber — these are typically ambiguous 0% codes that could map to N, B, C, or D depending on the nature of the supply. Assign the correct label manually before pressing Confirm.
Deleting a mapping sets it inactive but preserves the history — it does not permanently remove it. Use Restore to re-activate a previously deleted mapping without losing its configuration.
Each V-SDC label corresponds to a specific tax rate as defined by the Vanuatu Internal Revenue Commission (VIRA).
Tax Type Labels and Values on Receipts #
When an administrator uploads a PFX certificate, updates Tax Core credentials, or runs tax rate auto-mapping, VSMS Connect pulls the latest rates directly from the V-SDC /status endpoint and updates any local tax labels whose rates have changed. Every rate change is recorded in the audit trail under the event TAX_MAPPING_RATE_DRIFTED. Admins can also re-sync tax mappings on demand at any time from the Tax Rate Mappings screen. The system is designed to accommodate additional label codes in the future as market requirements evolve or VIRA introduces new tax categories.
VSMS Connect exclusively uses tax rates and label definitions received from TaxCore/V-SDC. No tax rate values are hardcoded or sourced from any other system — all fiscal tax calculations are governed solely by the rates configured in TaxCore and returned by the V-SDC at the time of fiscalisation.
VSMS Connect supports all nine V-SDC tax type labels currently defined by TaxCore (F, N, P, E, T, A, B, C, D). The platform is designed to accommodate additional labels should TaxCore introduce new tax types in the future — no application update is required as labels are pulled dynamically from the V-SDC during certificate registration.
When a fiscal receipt is generated, VSMS Connect prints each tax type label alongside its calculated value directly on the receipt. For example, a receipt may show A (VAT 15%), E (STT 6%), or P (PBL 0.6%) with the corresponding tax amount for that line item. These labels and values are returned by the V-SDC at the time of fiscalisation and printed exactly as received — VSMS Connect does not modify or round the tax values.
Auto-Map (Sage 200 Evolution only) #
Sage 200 Evolution users can use the Auto-Map feature:
1. On the Sage 200 Evolution integration screen, tap Auto-Map Tax Rates.
2. Enter your Sage database connection details when prompted.
3. VSMS Connect reads the tax rate table directly from your Sage database and suggests mappings automatically.
4. Review and confirm the suggestions.
What happens to unmapped invoices? #
Invoices with unmapped tax rates are held in Unmapped status and cannot be fiscalised. Once you save the mappings, use Reprocess Unmapped on the invoice list to re-evaluate and release them for fiscalisation.
8. Multi-Location Support #
If your business operates from more than one physical location, VSMS Connect lets you manage each separately with its own signing certificate.
Setting up locations #
1. Go to Business → Locations.
2. Your default Headquarters location was created automatically when you registered your business.
3. Tap Add Location to create additional locations (e.g. a second branch or warehouse).
4. Give each location a name and address.
Regular users (non-administrators) can view locations but cannot create, edit, or delete them. If a location change is needed, contact your administrator.
You cannot delete the default location. If you need to remove it, set a different location as the default first.
Assigning certificates to locations #
Each location can have its own V-SDC certificate:
1. Go to Business → Certificates.
2. Tap Upload Certificate and select the location it belongs to.
3. Upload the PFX file, enter the password and PAC/UID.
When an invoice is fiscalised, VSMS Connect automatically uses the certificate assigned to the location it belongs to. If no certificate is assigned to a specific location, it falls back to the default Headquarters certificate with a warning.
API Keys and locations #
When you generate an API Key for an on-premise agent (see Section 9), you can optionally scope it to a specific location. Invoices pushed via that key will be automatically tagged to that location.
Managing Certificates per Location #
Each location can have its own V-SDC certificate — required for businesses operating multiple sites that are each registered separately with TaxCore.
To upload a certificate for a specific location:
- Go to Businesses → Locations → [select location] → Certificates
- Tap Upload Certificate
- Upload the .pfx file and enter its passphrase
- Tap Set as Default to make it the active certificate for that location
If a location has no certificate assigned, VSMS Connect falls back to the Headquarters certificate and shows a warning on the invoice screen.
9. On-Premise Agents #
For businesses using local point-of-sale or accounting software (Amicus, Sage 100, Sage 200 Evolution, Sage 300), VSMS Connect provides two desktop agents that run as background services on your server.
Supported systems #
| System | Status |
|---|---|
| Xero | Fully supported |
| AMICUS | Fully supported |
| Sage 200 Evolution | Fully supported |
| Sage 100 | Fully supported |
| Sage 300 | Fully supported |
| Atrex | Fully supported |
How it works #
1. The agent connects to your local SQL Server database.
2. It reads new sales and refunds since its last run using a watermark (it remembers where it left off).
3. It maps the events to VSMS Connect’s invoice format.
4. It pushes them to your VSMS Connect account via an API Key.
5. If the push succeeds, the watermark advances. If it fails (e.g. network outage), the agent retries with automatic back-off and logs failures to a local file.
Installation — Windows #
1. In VSMS Connect, generate an API Key (see Section 10).
2. Copy the Backend URL, Business ID, and API Key from the API Key Reveal screen.
3. Download the Sales Agent installer from your VSMS Connect portal.
4. Run the installer — a setup wizard will guide you through:
Step 1: Select your POS provider (AMICUS or Sage 200 Evolution)
Step 2: Enter your local database connection details (server, database name, username, password)
Step 3: Enter your VSMS Connect Backend URL, Business ID, and API Key
5. The wizard validates the connection before saving.
6. The agent installs itself as a Windows Service and starts automatically.
Installation — Linux/macOS #
Service management is via systemd (Linux) or launchd (macOS). Printers connect via CUPS instead of Windows drivers.
Sales Agent
- In VSMS Connect, generate an API Key (see Section 10).
- Copy the Backend URL, Business ID, and API Key from the API Key Reveal screen.
- Download the Sales Agent binary from your VSMS Connect portal at
/api/v1/agents/. - Make it executable:
chmod +x vsms-sales-agent - Run the setup command and follow the prompts to configure your provider, database connection details, Backend URL, Business ID, and API Key:
./vsms-sales-agent setup - Install it as a background service:
./vsms-sales-agent installThe agent will start automatically and restart on reboot via systemd (Linux) or launchd (macOS).
Print Agent
- In VSMS Connect, generate a Setup Token (24-hour validity).
- Download the Print Agent binary from your VSMS Connect portal at
/api/v1/agents/. - Make it executable:
chmod +x vsms-print-agent - Ensure your receipt printer is visible in CUPS before proceeding:
lpstat -p - Run the setup command with your Backend URL and Setup Token:
./vsms-print-agent setup - Install it as a background service:
./vsms-print-agent install
The Print Agent supports any printer visible in CUPS — it is not limited to thermal printers. Any brand or model accessible via CUPS will work.
GTIN Compatibility #
The middleware fully supports products identified using Global Trade Item Numbers (GTIN), including GTIN-8, GTIN-12 (UPC), GTIN-13 (EAN), and GTIN-14 identifiers. Product records containing GTINs are preserved during synchronization between supported ERP/accounting systems (such as Sage, Xero, and Amicus Solutions) and VSMS, ensuring consistent product identification across all integrated platforms.
10. Managing API Keys #
API Keys authenticate the on-premise Sales Agents that push invoices from your local accounting software into VSMS Connect. Each key is scoped to a provider type and optionally to a specific location.
To create an API Key:
- Go to Businesses → Integrations → [provider] → API Keys → Create
- Set a name (e.g. “Till 1 — Warehouse”)
- Select the provider scope (e.g. AMICUS, Sage 200 Evolution)
- Optionally assign it to a specific location
- Tap Create — copy the key immediately, it cannot be retrieved after this screen is closed
To revoke a key:
Press Revoke on the key row. The agent using that key will stop syncing immediately. Generate a new key and update the agent configuration to restore connectivity.
Tip: Scope each key to a specific location when you have multiple sites — this ensures invoices pushed via that key are automatically tagged to the correct location.
11.1 Setting Up Receipt Printers #
Each receipt printer is registered in VSMS Connect as a Till. When an invoice is fiscalised, the signed receipt — including the legally required QR code — is automatically routed to the till associated with that invoice and printed without any staff action.
To pair a new printer:
- Go to Integrations → Receipt Printers
- Press Generate Setup Token — a one-time token is shown, valid for 24 hours
- On the computer connected to the printer, run the Print Agent installer (download from your VSMS Connect portal)
- Enter the Backend URL and Setup Token when prompted
- Enter a name for this till (e.g. “Till 1 — Main Counter”)
- Complete the wizard — the agent installs as a background service, claims the token, and registers as a named till
- The till appears in the Receipt Printers list as Online
Other actions:
| Action | How |
|---|---|
| Test a printer | Press Test Print on the till row — a test receipt is sent immediately |
| Rename a till | Press the edit icon on the till row |
| Re-pair after reinstall | Press Revoke Setup Token, then Generate Setup Token again and re-run the installer |
| Retry a failed print job | Go to Receipt Printers → Failed Print Jobs and press Retry |
Supported printers: Any printer compatible with CUPS (Linux/macOS) or standard Windows printer drivers. The Print Agent is not limited to a specific brand or model — thermal, USB, network, and Bluetooth printers are all supported.
11.2 How to Print a Receipt #
- Open the Home tab from the sidebar.
- Tap the invoice you want to print to open the invoice detail screen.
- See the Payment component under Fiscal Events, click it and access the invoice. Below it there will be a Print/ Share button which should Print a receipt. Can also be accessed by clicking the three dots at the end of the component ( ⋮ ).
- The signed receipt is automatically sent to the till (receipt printer) associated with that invoice.
Note: Printing is only available for fiscalised invoices. The receipt includes the legally required QR code for customer verification.
Retrying Failed Print Jobs #
If a signed receipt fails to reach the printer it appears in the Failed Print Jobs list. Open Receipt Printers from the sidebar, find the job, and press Retry. You do not need to pair or configure printers yourself — your administrator handles that.
Sending Receipts Electronically #
Fiscalised receipts can also be shared electronically as a PDF. From the invoice detail screen, tap the Print / Share button to save the signed receipt as pdf then share via email or any other platform (chat, SMS, etc.) available on the device. The PDF includes the legally required QR code for customer verification.
Pressing the Email receipt button, will allow the user to share receipts via email, not in pdf form, but with a link to verify receipt in TaxCore.
12. MCP Tokens #
VSMS Connect includes a built-in MCP (Model Context Protocol) server that lets AI assistants like Claude interact with your invoice and fiscalisation data via natural language.
Examples of what you can ask:
- “Show me all failed invoices from last week”
- “How many invoices were fiscalised today?”
- “Fiscalise the three oldest pending invoices”
- “List all tenants and their fiscalisation status”
To create an MCP token:
- Go to Businesses → Agents & MCP → Create Token
- Enter a name for the token (e.g. “Claude Desktop”)
- Press Create — copy the token and the MCP server URL shown on the next screen. The token is shown only once and cannot be retrieved afterwards
- In Claude Desktop, open Settings → Developer → Add MCP Server
- Paste the MCP server URL and token
- Claude can now query your VSMS Connect data directly
Managing tokens:
Only Administrators can create and revoke MCP tokens
Tokens are valid for 90 days
To revoke a token, press Revoke on the token row — access is cut off immediately
You can create multiple tokens (e.g. one per device or team member)
13. Daily Fiscal Report
#
The Daily Fiscal Report gives you a summary of all fiscalised invoices for a selected date or date range — useful for end-of-day reconciliation and compliance reporting.
To open it:
Go to Reports in the sidebar and select Daily Fiscal Report.
Using the report:
- Select a date or date range using the date picker at the top
- The report groups totals by:
- Invoice type — Standard, Proforma, Training
- Transaction type — Sale, Refund
- Payment type — Cash, Card, Split tender
- Press Export to download the full report as a CSV file
Note: Only fiscalised invoices appear in this report. Imported, Pending, Failed, and Unmapped invoices are excluded.
14. Local Audit Instructions #
The Audit screen is accessible from the sidebar and provides a complete, tamper-evident record of every action taken in VSMS Connect. It is the primary surface for compliance inspections.
What is recorded:
Every event is logged with a timestamp, the actor’s name and email, their IP address, and the full payload. This includes:
- User login, logout, and password changes
- Invoice fiscalisation, cancellation, copy, and refund operations
- Fiscalisation job creation and completion
- Accounting provider connections and disconnections
- Business settings modifications
- User invitations and role changes
- TaxCore credential updates
- Auto-fiscalise toggle changes
Navigating the audit log:
- Use the date filter to scope to a single day, week, month, or custom range
- Use the category filter to narrow to auth events, fiscal events, invoice events, or user events
- Tap any row to open the event detail sheet — it shows the full JSON payload and lets you copy it to the clipboard
- Administrators can press Export to download the visible events as a CSV file — the export applies the same date and category filters currently active on screen
For inspectors: Ask the business to open the Audit screen and filter to the date range in question. Every fiscalisation event, the user who triggered it, and the V-SDC response are all visible and exportable.
15. Remote Audit Instructions
#
Remote inspection is performed against the TaxCore central portal using the verification URL embedded in every fiscalised invoice.
How it works:
Every fiscal receipt includes a QR code that resolves to the TaxCore verification URL for that invoice. An inspector can:
- Scan the QR code with any smartphone camera — no app required
- Or open the verification URL directly in any browser
Both methods open the official TaxCore portal entry for that invoice, showing the government-signed fiscal record.
Identifying your installation:
Open Profile from the sidebar. The About card at the bottom of the page shows three identifiers an inspector may ask for:
| Field | What it is |
|---|---|
| Manufacturer | Code 200 Solutions |
| Serial Number | The unique installation ID for your VSMS Connect deployment |
| Software Version | The version of the running app build |
These allow an inspector to match your running application to the accredited build registered with TaxCore.
Tip: Screenshots of the About card and a fiscalised invoice QR code are usually sufficient for a standard remote audit. For a full audit package, export the relevant date range from the Audit screen (see Section 14).
16. Switching Language
#
VSMS Connect is available in three languages:
| Code | Language |
|---|---|
| EN | English |
| FR | French |
| BI | Bislama |
To switch language:
Press the language selector (EN / FR / BI) in the top-right corner of the header at any time — on both the web and mobile app.
The choice is saved automatically and remembered across restarts. All screens, labels, status messages, and notifications switch to the selected language immediately.
17. Full Installation Guide #
Before beginning, note that this guide covers software installation and configuration only. The following are out of scope: network and hardware procurement, V-SDC certificate procurement from the Vanuatu Customs and Revenue Service, and accounting provider portal setup (Xero, Sage, or MYOB account creation).
1. System Requirements #
Before beginning, ensure these are installed:
- Node.js v20 LTS
- Yarn 1.22 Classic (npm is not supported)
- Microsoft SQL Server 2019
- Redis 6.x
- Windows 10/11, macOS, or Linux
- Chromium-based or Safari browser for the web client
2. Repository Layout #
- apps/app — Expo / React Native client (web, iOS, Android)
- services/backend — Express HTTP API
- services/consumer — Fiscalisation job consumer; polls Redis Stream and submits to V-SDC
- services/db — MS SQL microservice; single ingress point for all SQL queries
- packages/dtos — Shared DTOs and API contracts
- packages/logger — Shared logger, git submodule
- packages/utils — Shared helpers, git submodule
- services/salesAgent — On-premise sales data collection agent
- services/printAgent — On-premise receipt printing agent
3. Preparing the Environment #
Run these commands in order:
git clone <repo>
cd vanuatu.taxcore.vsmsconnect
git submodule update –init –recursive
yarn install
(cd packages/utils && yarn build)
(cd packages/logger && yarn build)
(cd packages/dtos && yarn build)
Build order matters: dtos imports both utils and logger. Always build in the order shown.
4. Configuring Environment Files #
Each service has an .env.example. Copy it to .env and fill in the values.
- apps/app/.env — EXPO_PUBLIC_ENVIRONMENT, EXPO_PUBLIC_BACKEND_BASEURL, EXPO_PUBLIC_FRONTEND_BASEURL
- services/backend/.env — DB_SERVICE_URL, REDIS_URL, JWT key paths, Xero/Sage/MYOB credentials, DB_ENCRYPTION_KEY, CERT_STORAGE_DIR
- services/salesAgent/.env — VSMS_BACKEND_URL, VSMS_BUSINESS_ID, VSMS_API_KEY, VSMS_PROVIDER accepts: amicus, sage100, sage200evolution, sage300, Atrex
, local DB connection string - services/printAgent/.env — VSMS_BACKEND_URL, VSMS_SETUP_TOKEN, VSMS_TILL_NAME
- services/consumer/.env — DB_SERVICE_URL, REDIS_URL, TAXCORE_VSDC_URL, CERT_STORAGE_DIR
- services/db/.env — MS SQL connection string, S2S JWT signing keys
Never commit a populated .env file.
Security: Communication with V-SDC #
- All communication between VSMS Connect and the V-SDC (Virtual Sales Data Controller) service is conducted exclusively over HTTPS. The
TAXCORE_VSDC_URLenvironment variable must be set to an HTTPS endpoint — the consumer service enforces secure transport for all fiscalisation requests submitted to TaxCore. No unencrypted HTTP communication with V-SDC is permitted.
To generate a strong encryption key for DB_ENCRYPTION_KEY and provider token encryption keys, run this command:
node -e “console.log(require(‘crypto’).randomBytes(32).toString(‘hex’))”
5. Bringing Up Each Service #
Start in this order, each in its own terminal:
- cd services/db && yarn dev → port 3233
- cd services/backend && yarn dev → port 3000
- cd services/consumer && yarn dev → no HTTP port, polls Redis Stream
- cd apps/app && yarn web → port 8081
- cd apps/app && yarn start → Expo Dev Tools URL — scan the QR code with a physical device to run on iOS or Android via Expo Go
Migrations run automatically when the db service starts.
Currency and Decimal Handling #
VSMS Connect is configured for VUV (Vanuatu Vatu), which carries no decimal places for item prices. However, the V-SDC fiscalisation engine calculates and returns tax values with up to two decimal places in the invoice response. The backend middleware is built to handle invoice responses containing decimal tax values — these are stored and processed at full decimal precision as returned by V-SDC, ensuring no rounding loss occurs in the fiscalisation pipeline.
6. Database Migrations #
Migrations are in services/db/migrations/ and run on startup automatically. Core tables: Users, Businesses, Invoices, InvoiceLineItems, InvoicePayments, FiscalisationJobs, AuditLogs, XeroConnections, SageConnections, MyobConnections, TaxRateMappings, UnmappedTaxTypes.
Added in migrations 042–052: Locations, Certificates, Tills, PrintJobs, ApiKeys, EmailVerifications, InviteTokens, McpTokens, LicenceKeys, TaxcoreTaxRates
.
7. Verifying Service Health #
- Backend: GET http://localhost:3000/health returns {“status”:”ok”}
- Consumer: log line [fiscalisation-job] consumer started
- DB microservice: log line [db] listening on :3233
- App: http://localhost:8081 loads the welcome screen with no console errors
8. Handover Checklist #
- All four services running and healthy
- Browser loads the welcome screen at http://localhost:8081
- .env files stored in deployment vault, not in git
- CERT_STORAGE_DIR on a shared volume readable by both backend and consumer
- Redis persistence enabled (appendonly or RDB snapshots)
- MS SQL backup schedule agreed with customer
- For on-premise deployments also confirm:
- Sales Agent running and pushing invoices
- Print Agent running and till paired
- Agent binaries accessible at /api/v1/agents/
- AGENT_BINARIES_DIR set in the backend .env
9.1 Sales Agent — Windows #
Before installing, generate an API Key: Businesses → Integrations → [provider] → API Keys → Create.
- Download the Sales Agent installer from /api/v1/agents/ on the backend
- Run the installer and follow the wizard
- Select your accounting provider
- Enter the local accounting software database connection details
- Enter the VSMS Connect Backend URL, Business ID, and API Key
- Complete the wizard — the agent installs as a background service and starts automatically
9.2 Print Agent — Windows #
Before installing, generate a Setup Token: Businesses → Receipt Printers → New Printer → Generate Setup Token. Valid for 24 hours.
- Download the Print Agent installer from the VSMS Connect app
- Run the installer
- Enter the VSMS Connect Backend URL
- Enter the one-time Setup Token
- Enter a till name (e.g. “Till 1 — Main Counter”)
- Complete the wizard — the agent registers as a named till and starts automatically
9.3 Sales Agent and Print Agent — Linux / macOS #
Service management is via systemd (Linux) or launchd (macOS). Printers connect via CUPS instead of Windows drivers.
Sales Agent:
- Download the binary from /api/v1/agents/
- chmod +x vsms-sales-agent
- ./vsms-sales-agent setup — follow the prompts for provider, DB connection, Backend URL, Business ID, API Key
- ./vsms-sales-agent install
Print Agent:
- Download the binary from the VSMS Connect app
- chmod +x vsms-print-agent
- ./vsms-print-agent setup — enter Backend URL, Setup Token, till name
- ./vsms-print-agent install
Ensure your receipt printer is visible in CUPS (lpstat -p) before running Print Agent setup.
18.1 Creating the First Administrator Account #
Open VSMS Connect in a browser. Press Get Started on the welcome screen. Fill in First name, Last name, Username, Email, and Password (entered twice to confirm).
. Press Create Account. You are logged in automatically and taken to the Register Business wizard.
Registration locks after the first user — additional users must be invited. The Get Started screen disappears once an account exists.
18.2 Entering TaxCore Credentials #
Step 2 of the Register Business wizard needs four items from your TaxCore onboarding package:
- V-SDC certificate (.pfx) — the mTLS client certificate from TaxCore. Found in your onboarding email.
- PFX passphrase — decrypts the .pfx file. Treat as a secret. Provided alongside the certificate.
- PAC — an eight-character pairing code printed on the physical V-SDC label or included in your TaxCore onboarding letter.
- Business UID — an eight-character uppercase alphanumeric ID. It must match the certificate exactly. If it does not match, the save is rejected with an inline error on that field.
After submitting, VSMS Connect validates the PAC, confirms the certificate and UID align, then stores the credentials encrypted with AES-256-GCM.
18.3 The Administration Dashboard #
After registration the Home screen is empty until the first invoice arrives via a provider sync or CSV import. This is normal — connect an accounting provider and run the first sync to see invoices.
18.4 Inviting Users #
Invite links are valid for 72 hours. If the invitee misses the window, send a new invite from the Users screen.
18.5 Connecting Xero #
- Press Connect VSMSConnect to Xero
- The Xero OAuth consent screen opens in a new browser tab (web) or system browser (mobile)
- Sign in with the Xero account that owns the organisation
- Tick the consent checkboxes and press Allow
- You are redirected back. The card shows the active tenant name and a green Connected badge
18.6 Connecting Sage #
Same OAuth flow as Xero. Press Connect, approve the consent screen, and you are redirected back. There is no tenant selector — Sage tokens are scoped to a single business.
18.7 Connecting MYOB #
- Press Connect VSMSConnect to MYOB and complete the consent screen
- A list of company files is shown — pick the one you want to fiscalise from
- Press Activate. The card shows a green Connected badge with the selected file name.
18.8 Tax-Rate Mappings #
The valid V-SDC labels are: F (standard taxable), N (non-taxable/zero-rated), P (proforma), E (exempt), T (tourism levy), A, B, C, D (rates A–D).
Press Sync tax rates from [provider] to fetch rates and run auto-map. Mapped tax rates are visible at any time by navigating to Integrations → select your provider → Tax Rate Mappings, allowing administrators to review current mappings on demand. Rows marked Needs review are ambiguous — assign the correct label manually then press Confirm. Invoices blocked for MISSING_TAX_MAPPING will unlock immediately once their mapping is confirmed.
Delete sets a mapping inactive but preserves history. Restore re-activates it.
18.9 Auto-Fiscalise Toggle #
Switching the toggle off does not disable manual fiscalisation. Users with submit_invoices or administrator can still trigger any eligible invoice manually at any time.
18.10 Adding a Location #
- Open Businesses → Locations → Add Location
- Enter the Name, Address, and Type
- Press Save
You cannot delete the default location. Set a different location as default first if you need to remove it.
18.11 Final Configuration Checklist #
- First administrator registered
- Business registered with legal name, TIN, address, and currency
- TaxCore credentials uploaded — certificate shows green Uploaded status
- At least one accounting provider connected
- Tax-rate mappings confirmed — no amber Needs review rows remaining
- Teammates invited with the correct roles
- Auto-fiscalise toggle set to match the customer’s policy
- Audit screen reachable and showing recent events
- At least one location created or Headquarters confirmed
- Certificates uploaded and showing green for each active location
- API Keys created for any on-premise agents
- Receipt printers paired and showing Online
- On-premise provider integrations showing Connected with first invoices appearing