By creating an account or using VSMS Connect, you agree to be bound by these Terms of Service. If you do not agree, do not use the service.
2. Description of Service
VSMS Connect is a cloud-based application operated by Code200 that connects your accounting software (Xero, Sage, MYOB) to the Vanuatu Government’s TaxCore fiscalisation platform. The service automates the submission of signed electronic fiscal invoices to the Vanuatu Department of Customs and Inland Revenue (DCIR) as required under Vanuatu tax law.
3. Account Registration
• You must be duly authorized to act on behalf of the business you register. • You are responsible for keeping your login credentials confidential. • You are responsible for all activity that occurs under your account. • You must notify us immediately of any suspected unauthorized use at support@code200.solutions.
4. Permitted Use
• You may only use VSMS Connect for lawful business purposes in connection with Vanuatu tax compliance. • You must not attempt to reverse-engineer, copy, or create derivative works from the service. • You must not use the service to submit fraudulent or inaccurate fiscal data to TaxCore.
5. Business Data
You retain ownership of all invoice and business data you submit. By using the service you grant Code200 a limited licence to process your data solely to provide the service. You are responsible for the accuracy of all data submitted to TaxCore through the service.Once a fiscal invoice has been signed by the V-SDC and submitted to TaxCore, it cannot be deleted from the Vanuatu Government’s system. This is a legal requirement under Vanuatu tax law.
6. Third-Party Integrations
The service integrates with third-party platforms including Xero, Sage, MYOB, and the Vanuatu TaxCore platform. Your use of those platforms is subject to their own terms of service and privacy policies. Code200 is not responsible for the availability or accuracy of data provided by those platforms.
7. Service Availability
We aim to provide continuous availability but do not guarantee uninterrupted service. Scheduled maintenance, network issues, or events outside our control may cause temporary downtime. We will endeavour to notify users of planned maintenance in advance.
8. Intellectual Property
All software, design, and documentation comprising VSMS Connect is the property of Code200. These Terms do not transfer any intellectual property rights to you.
9. Limitation of Liability
To the maximum extent permitted by applicable law, Code200 shall not be liable for any indirect, incidental, or consequential damages arising from your use of the service, including penalties imposed by the DCIR resulting from inaccurate data you submit. Our total liability for any claim shall not exceed the fees paid by you in the preceding 12 months.
10. Termination
• You may stop using the service at any time. • We may suspend or terminate your access if you breach these Terms or if we are required to do so by law. • Upon termination, your right to access the service ceases immediately. Fiscal data already submitted to TaxCore remains with the Vanuatu Government in accordance with applicable law.
11. Changes to These Terms
We may update these Terms from time to time. We will notify you by email or in-app notification before material changes take effect. Continued use of the service after changes take effect constitutes your acceptance of the revised Terms.
12. Governing Law
These Terms are governed by the laws of the Republic of Vanuatu. Any disputes arising under these Terms shall be resolved in the courts of Vanuatu.
13. Contact
For questions about these Terms of Service, please contact us at: management@code200.solutions
Q2 — Product User Manual
VSMS Connect — Code 200 Solutions
VSMS Connect is the Code 200 Solutions Vanuatu fiscalisation platform. This manual covers day-to-day operator usage: signing in, finding invoices, understanding statuses, fiscalising payments, requesting Copy or Refund receipts, resolving blocked invoices, and surfacing the data an inspector needs during a local or remote audit.
Audience — This document is written for end users who run the till every day. The technical setup is covered in Q3 (Installation Guide); the one-time administrator configuration is covered in Q4 (Configuration Manual).
1. Signing in
Open the VSMS Connect web application or launch the mobile app from your home screen.
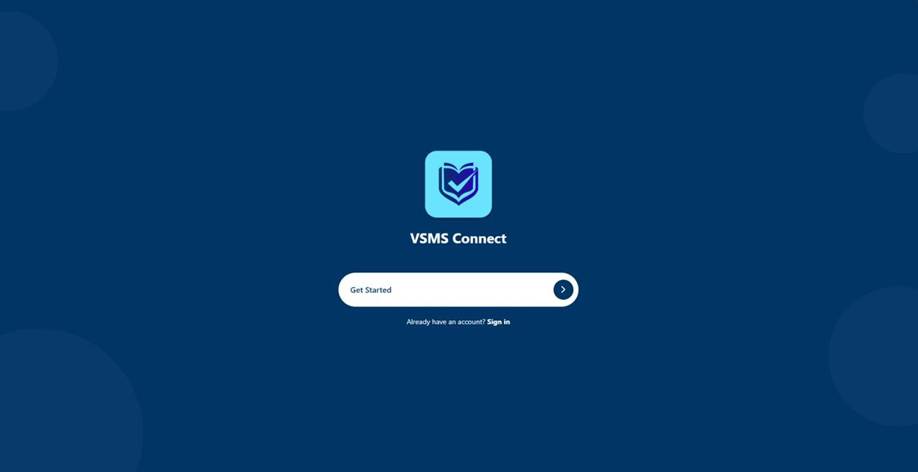
The welcome screen prompts you to either get started (first time) or sign in (returning user).
Figure 1 — Welcome screen on first launch.
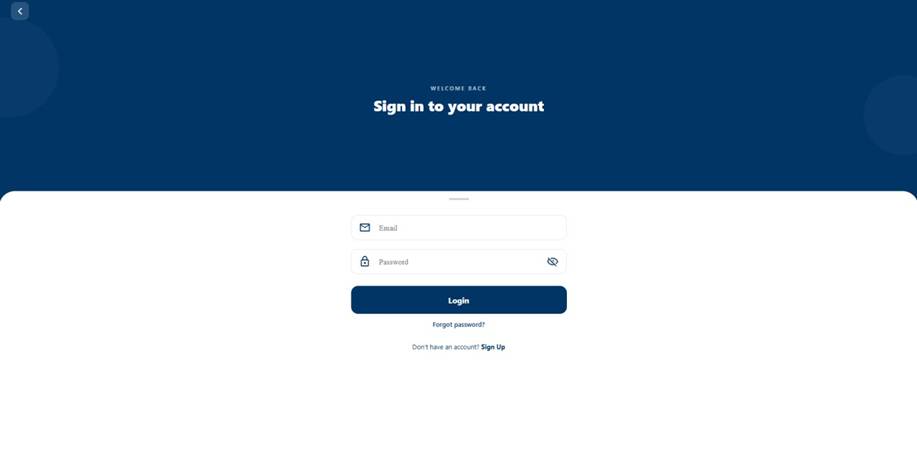
Press the Sign in link if you already have an account. Enter the email and password your administrator gave you and press Login. If the credentials are correct the app routes you to the dashboard; if not, you will see “Invalid credentials” — wait a moment and try again or use the Forgot password link to receive a six-digit reset code by email.
Figure 2 — Sign-in screen.
2. Navigating the dashboard
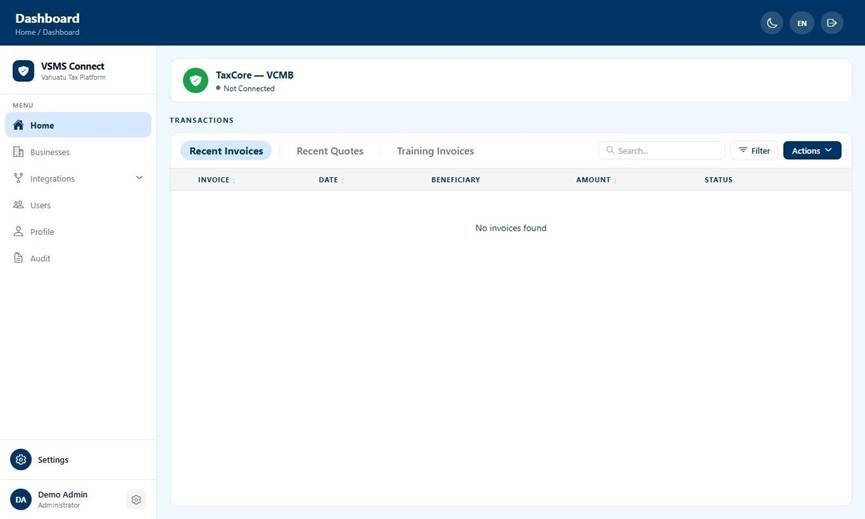
Once authenticated, the home screen lists every invoice imported from your connected accounting provider (Xero, Sage, or MYOB) or uploaded via CSV. The left-hand sidebar (web) or slide-out drawer (mobile) gives access to the main areas: Home, Businesses, Integrations, Users, Profile, and Audit. Items appear only if your role allows them — Audit is hidden unless you have the View Audit permission, for example.
Figure 3 — Home dashboard. The sidebar lists every section available to your role; the main panel shows the invoice table grouped into Recent Invoices, Recent Quotes, and Training Invoices.
Three tabs along the top of the table partition the data: Recent Invoices (everything except quotes and training submissions), Recent Quotes (Proforma documents only), and Training Invoices (used for V-SDC training mode submissions). Switching tabs resets search, pagination, and selection so each view is independent.
Use the search bar to filter by invoice number, contact name, or amount. Press the Filter button to expose date and provider chips so you can scope to a single day, week, month, custom range, or a specific accounting source.
3. Understanding invoice statuses
Every invoice carries a status pill showing where it is in the fiscalisation lifecycle. The table below lists every possible status and what action, if any, you can take.
Status
Meaning
What to do
Imported / Pending
Invoice loaded from your accounting system but not yet sent to TaxCore.
No action required if auto-fiscalise is enabled. Otherwise press Fiscalise.
Fiscalised
TaxCore has signed the invoice; a fiscal receipt and verification URL are available.
Print, share, or open Copy / Refund as needed.
Status
Meaning
What to do
Processing
Currently being sent to TaxCore for signing.
Wait — clears automatically once TaxCore responds.
Failed
V-SDC rejected the submission. The error message is shown under the status pill.
Correct the underlying issue and refiscalise. If the cause is unclear, escalate to your administrator.
Blocked
A precondition is not met (missing tax mapping, missing referent document, currency mismatch, etc.).
Resolve the reason shown under the pill. Most blocks need an administrator to map a tax code or link an invoice.
Cancelled
The invoice has been cancelled in TaxCore and a cancellation receipt is paired with the original.
No further action; the cancellation is final.
Unmapped
The invoice contains a tax code that has not been mapped to a V- SDC label.
An administrator must configure the tax mapping before this invoice can be fiscalised.
4. How fiscalisation works
Fiscalisation submits an invoice to the V-SDC (Virtual Secure Digital Device) which signs it and returns a fiscal invoice number, a verification URL, and a QR code. Two paths trigger fiscalisation:
Auto-fiscalisation — when an administrator has switched the Auto-fiscalise toggle on (the default for new businesses), every eligible paid invoice arriving via Sync Now, webhook, or the 15-minute polling job is dispatched automatically.
Manual fiscalisation — you can still trigger it yourself for any eligible invoice, either one at a time from the detail screen or in batches of up to ten from the home table.
The two paths are not mutually exclusive: auto-fiscalisation handles the common case, manual fiscalisation handles retries and any invoices that were temporarily blocked and have just become eligible.
Post-fiscalisation data
After fiscalisation, each invoice stores:
Fiscal Invoice Number — TaxCore-assigned unique identifier for the receipt.
QR Code — printable on receipts; links directly to the verification URL.
Verification URL — for customer self-verification via the TaxCore portal.
Fiscal Timestamp — date and time of signing as recorded by TaxCore.
Raw V-SDC Response — the full JSON payload returned by the V-SDC.
5. Triggering manual fiscalisation
On the home screen, tick the checkbox at the start of each invoice row you want tofiscalise. The action bar shows the running count.
Press Actions → Fiscalise. The button stays disabled if more than ten rows are selected — the batch cap is enforced server-side too.
A confirmation toast appears once the V-SDC has signed every invoice in the batch. Rowsrefresh automatically and flip to the Fiscalised status.
To fiscalise a single invoice without leaving the detail screen, open the invoice from the home table and press Fiscalise on the payment row.
6. Requesting a Copy or Refund
After a payment has been fiscalised you can issue two follow-up receipts: a Copy (duplicate of the original, useful when the buyer has lost their first copy) or a Refund (reverses the original sale in TaxCore).
Open the fiscalised invoice from the home screen. The Payments section shows everypayment for the invoice.
Expand the payment row. The kebab (■) menu and the action button strip both offer Copy and Refund.
Select the action. A new invoice is created — Copy keeps the transaction type, Refundflips it. The new invoice is fiscalised immediately and appears under Linked Invoices on the original.
One refund per payment — Each source payment can be refunded once. If you need to refund a payment again, escalate to your administrator — they can use the cancellation flow instead.
Note: Standard invoices permit one refund per payment. Amicus on-premise invoices support multiple refunds per sale.
Supported Payment Types
VSMS Connect supports the following payment methods: Cash, Card, Check, Wire Transfer, Voucher, Mobile Money, Other. Split-tender is also supported — a single invoice can be paid across multiple payment types (for example, part Cash and part Card).
7. Handling blocked invoices and errors
A blocked invoice shows the block reason directly under the status pill so you can see what is wrong without opening the invoice. The most common reasons and their recovery paths are:
Reason
Recovery
Missing tax mapping
An administrator must map the provider tax code to a V-SDC label on the Integrations screen. After the mapping is confirmed the blocked invoices unlock automatically.
Referent document missing
The credit note has no linked original invoice. Link it in your accounting system and re-sync.
Referent not fiscalised
The original invoice this refund references has not been fiscalised yet. Fiscalise the original first; the refund will become eligible automatically.
Currency mismatch
The invoice was issued in a currency other than the business currency. Re-issue in the business currency.
Total mismatch
The sum of line items does not match the invoice total. Correct the invoice at the source and re-sync.
Failed invoices include the V-SDC error message in the same place. Common causes are connectivity issues to V-SDC and certificate problems — retry once after a minute; if the failure persists, escalate to your administrator.
8. Local audit instructions
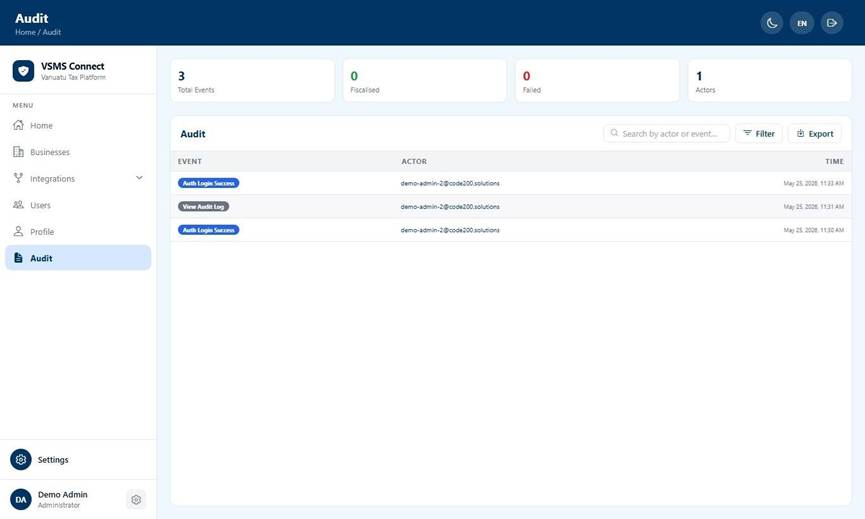
Inspectors can review every action performed in VSMS Connect by opening the Audit screen from the sidebar. The screen lists each event with its type, the actor (the user who performed it), the IP address and user agent at the time, and the full payload.
Figure 4 — Audit log. Filters expose Today / This Week / This Month / Custom ranges and category chips (Auth, Fiscal, Invoice, User).
Use the date filter to scope to a single day, week, month, or custom range.
Use the category filter to narrow to auth events, fiscal events, invoice events, or user events.
Tap any row to open the event detail sheet which shows the JSON payload and lets youcopy it to the clipboard.
Administrators can export the visible events to CSV via the Export button. The CSV uses the same date and category filters that are currently active on screen.
9. Remote audit instructions
Remote inspection is performed against the TaxCore central portal using the verification URL embedded in each fiscalised invoice. Every fiscal receipt carries a QR code that resolves to the same URL — an inspector can scan it with any smartphone camera and open the verification page in their browser without needing to type anything.
Open any fiscalised invoice and locate the Verification URL field, or ask the customer to scan the QR code printed on their receipt.
The TaxCore portal displays the signed receipt details, confirming authenticity.
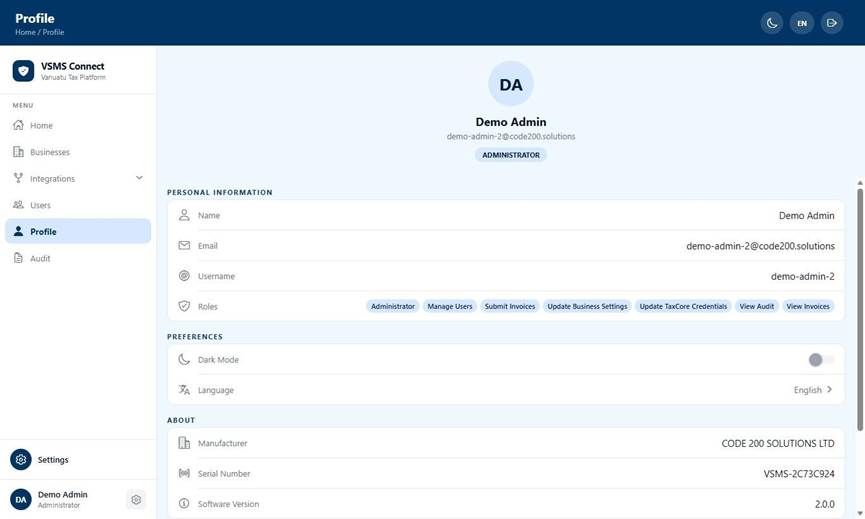
The Profile → About card (open Profile from the sidebar) surfaces three identifiers an inspector may ask for: Manufacturer (Code 200 Solutions), Serial Number (the unique installation ID), and Software Version. These let the inspector match the running app to the accredited build.
Figure 5 — Profile screen. The About card at the bottom of the page identifies the installation for remote inspection.
10. Switching language
Press the language selector (EN / FR / BI) in the top-right header at any time.
The choice is remembered across restarts and applies on both web and mobile.
VSMS Connect supports English, French, and Bislama.
11. Viewing the Daily Fiscal Report
Open the Reports section from the sidebar.
Select a date or range using the date picker at the top.
The report groups totals by invoice type (Standard, Proforma, Training), transaction type(Sale, Refund), and payment type (Cash, Card, Split).
Use the Export button to download the report as CSV.
12. Managing Locations
If your business operates from more than one site, each site appears as a separate Location. You can view your locations from the sidebar under Businesses. Each location shows its name, address, and the certificate currently assigned to it. You cannot create or delete locations yourself — contact your administrator for location changes.
Navigate to Businesses in the sidebar.
Select the location you want to inspect.
Review the assigned certificate and address details.
13. Receipt Printers
Each till has a receipt printer registered to it. When an invoice is fiscalised, the signed receipt is automatically sent to the printer paired with that till. If a print job fails it will appear in the Failed Print Jobs list on the Receipt Printers screen (accessible from the sidebar). Tap Retry to resend it. You do not need to pair or configure printers — your administrator handles that.
Open Receipt Printers from the sidebar.
If any failed print jobs appear, tap Retry to resend them.
Electronic Receipt Sharing
Fiscalised receipts can be shared electronically. From the invoice detail screen, tap the Print /Share button to save the signed receipt as a PDF and share via email or any other platform.
Alternatively, tap Email Receipt to share a link to the TaxCore verification page directly.
Supported Paper Size
Supported Paper Documents can be printed on A4 paper. Thermal receipt printers support paper roll widths from 57mm to 80mm.